The documentation
-
+
Introduction
Firstly we would love to send our great thanks to you for purchasing Responsive for WPBakery Page Builder Plugin. This documentation covers almost everything to guide you step by step from the start to have your site on air. We encourage you to read thoroughly all section before you go on.
Thanks again and enjoy building your website with Responsive for WPBakery Page Builder Plugin.
Support: https://bestbug.ticksy.com/
-
+
WordPress Information
Before installing Responsive for WPBakery Page Builder plugin, please make sure you have a working WordPress version already installed. For further guide to install WordPress, please find in below useful links:
- WordPress Codex: General info about WordPress and how to install your server.
- First Steps With WordPress: Multiple topics about WordPress.
- FAQ New To WordPress: Popular FAQs about WordPress.
-
+
Download Plugin Package
It is important to download the latest version of plugin package from your Codecanyon account. The Installable WordPress plugin file is just the installable WordPress plugin files, while the Plugin Package includes these following files and folders:
- Documentation Folder – contains document and other materials
- documentation.html - documentation
- changelog.html - changelog
- Installation Files Folder – contains all installable files:
- vc_responsive_design.zip - plugin file
- Sample Data Folder – contains sample data files:
- devices.xml - the Devices example
- Documentation Folder – contains document and other materials
-
+
Requirement for Plugin
To use Responsive for WPBakery Page Builder plugin, follow this checklist to ensure your site can work well with Responsive for WPBakery Page Builder plugin:
- WordPress 4.x or higher
- PHP5.6 or higher
- Visual Composer 4.7.x or higher
-
+
Release log
Installation
-
+
Install Plugins
Extract the package downloaded from Codecanyon, you will get the installable WordPress plugin file called vc_responsive_design.zip which is located in “Installation Files” folder. Choose one of two ways below to install plugin:
Via WordPress:
- Step 1. Log into your WordPress Admin area.
- Step 2. Look down the left-hand column for “Plugins” and then click on the word “Add new” Step 3. In the “Add Plugins” page, click “Upload Plugin”then click “Choose File” to browse for the plugin installation file in [path-to-your-downloaded-package]/Installation File/vc_responsive_design.zip). Click “Install Now”.

- Step 5. After installed successfully, click “Activate” to make the plugin active
Via FTP:
- Step 1. Use your FTP software to browse to “wp-content/plugins folder to install plugins
- Step 2. Extract the installation files to their corresponding folders, for example “vc_responsive_design.zip“ to “vc_responsive_design“ and upload to server
- Step 3. Once it’s uploaded, go to your WordPress Admin, browse to “Appearance > Plugins“
- Step 4. Click “Activate“ to make the plugin active
-
+
Import Sample Data
In /Sample Data/ folder, you can find there are:
- devices.xml – Main Data
To import sample data, Please follow these steps:
- Step 1: Make sure you have installed Responsive for WPBakery Page Builder plugin
- Step 2. In your WordPress Admin area, look down the left-hand column for “Tools > Import” and then click on WordPress
- Step 3: If it is not yet installed before, you have to install it. On the popup window, click on “Install Now“
- Step 4: After installed successfully, click on Activate Plugin & Run Importer
- Step 5: Browse for [path-to-your-downloaded-package]/Installation File/Sample Data/devices.xml and click Upload File and Import.
- Step 6: After uploading, the confirmation page appears. Check the Download and import file attachments option and click Submit. If you have trouble with importing (it might breaks in the middle due to long execution time), try again with this option Unchecked! Or, try to import separate files as they are smaller.
- Step 7: After uploading, the confirmation page appears. Check the Download and import file attachments option and click Submit
- Step 8: When you see a message “All done. Have fun!”, you will know that the import is done. NOTE: you may need to re-import the second time if the data is large. Back to Step 1.
-
+
Update plugins
Via Wordpress:
- Step 1: Deactivate plugin by going to Plugins > Installed plugins.
- Step 2: Delete older version by clicking on Delete link. Confirm to delete.
- Step 3: Update and re-install new version.
Auto update:
- Step 1: Go to Plugins > Add News > Upload, find and install envato-wordpress-toolkit.zip file ( click here to download)
- Step 2: To establish an Envato Marketplace API connection navigate to the Envato Toolkit page and insert your Marketplace username and secret API key in the designated input fields. To obtain your API Key, visit your “My Settings” page on any of the Envato Marketplaces
- Step 3: Once the API connection has been established you will see a list of plugins that can be auto updated/installed. If you don’t see any plugins and are certain you’ve done everything correct, there is a good chance the plugin author has not updated their plugin to be available for auto install and update. If that’s the case, please contact the plugin author and ask them to update their plugin’s information
Via FTP:
- Unzip the .zip files of the plugin.
- Login to your FTP account and navigate to your WordPress Installation directory
- Navigate to the folder /wp-content/plugins
- Override the folders of these plugins
How to use?
-
+
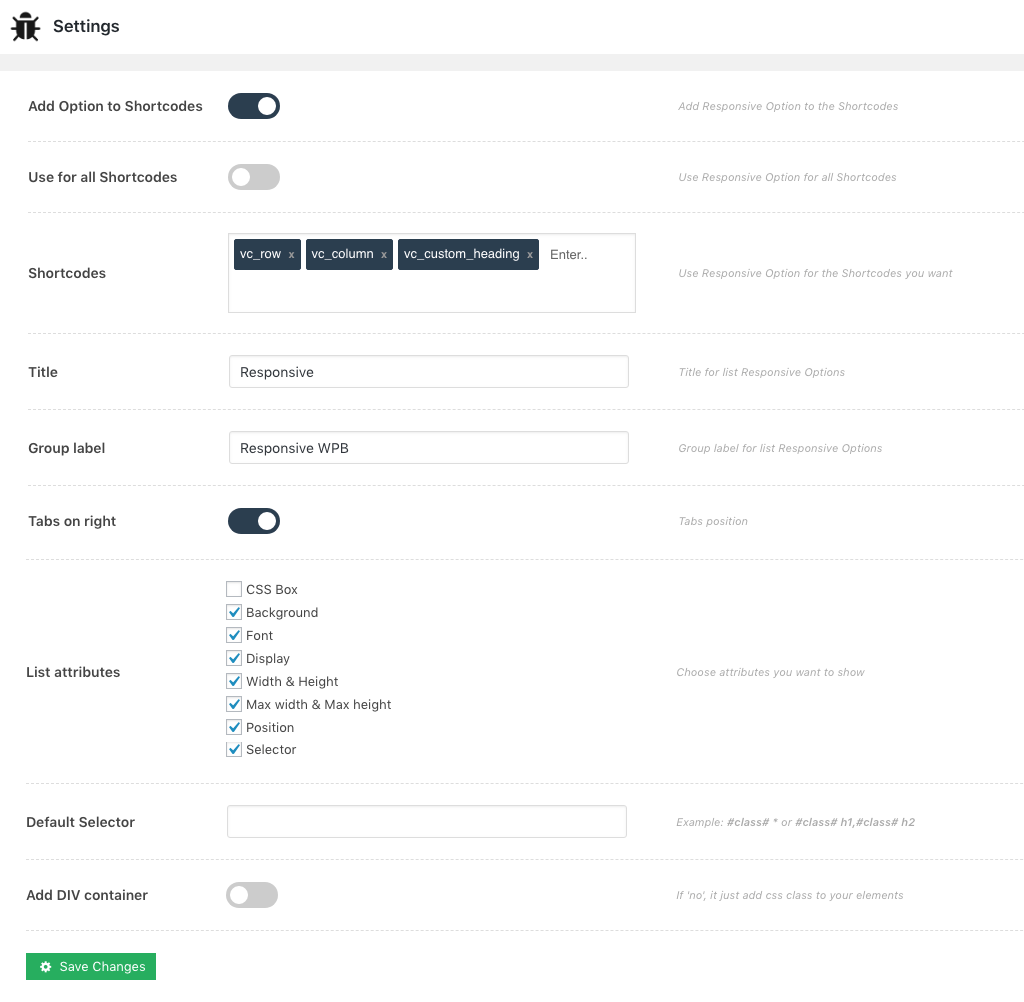
Plugin Settings
In your WordPress Admin area, look down the left-hand column for “Responsive WPB > Settings”
-
+
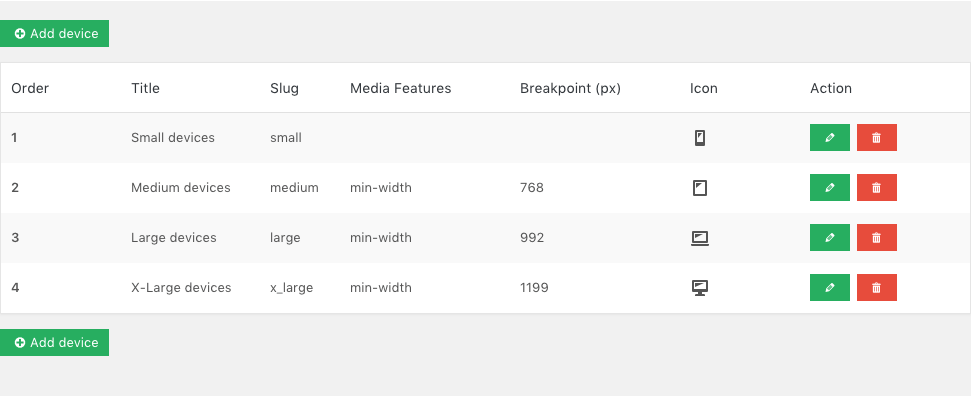
Manage Devices
In your WordPress Admin area, look down the left-hand column for “Responsive WPB > All Devices”
-
+
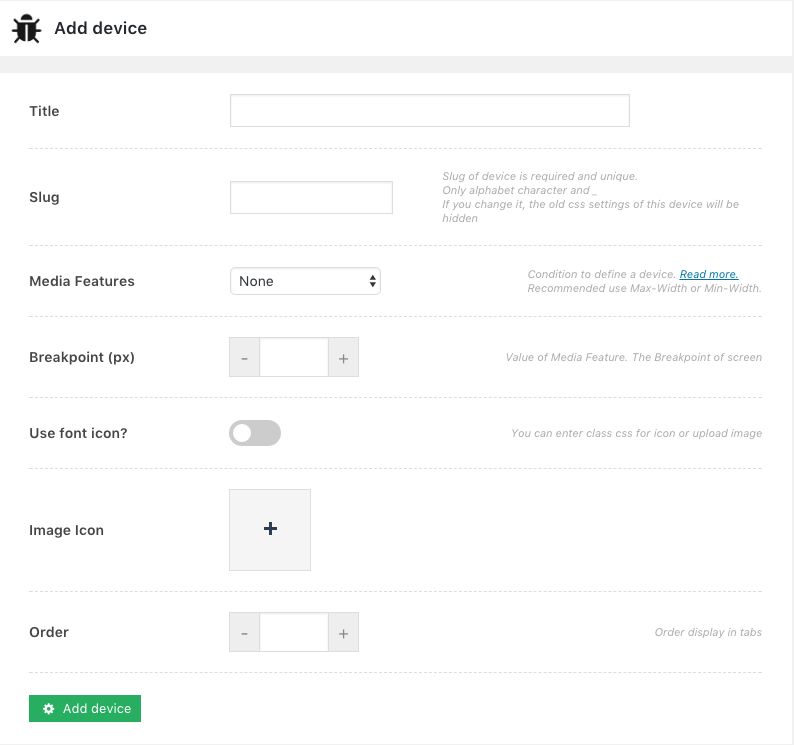
Add Device
In your WordPress Admin area, look down the left-hand column for “Responsive WPB > Add Device”
-
+
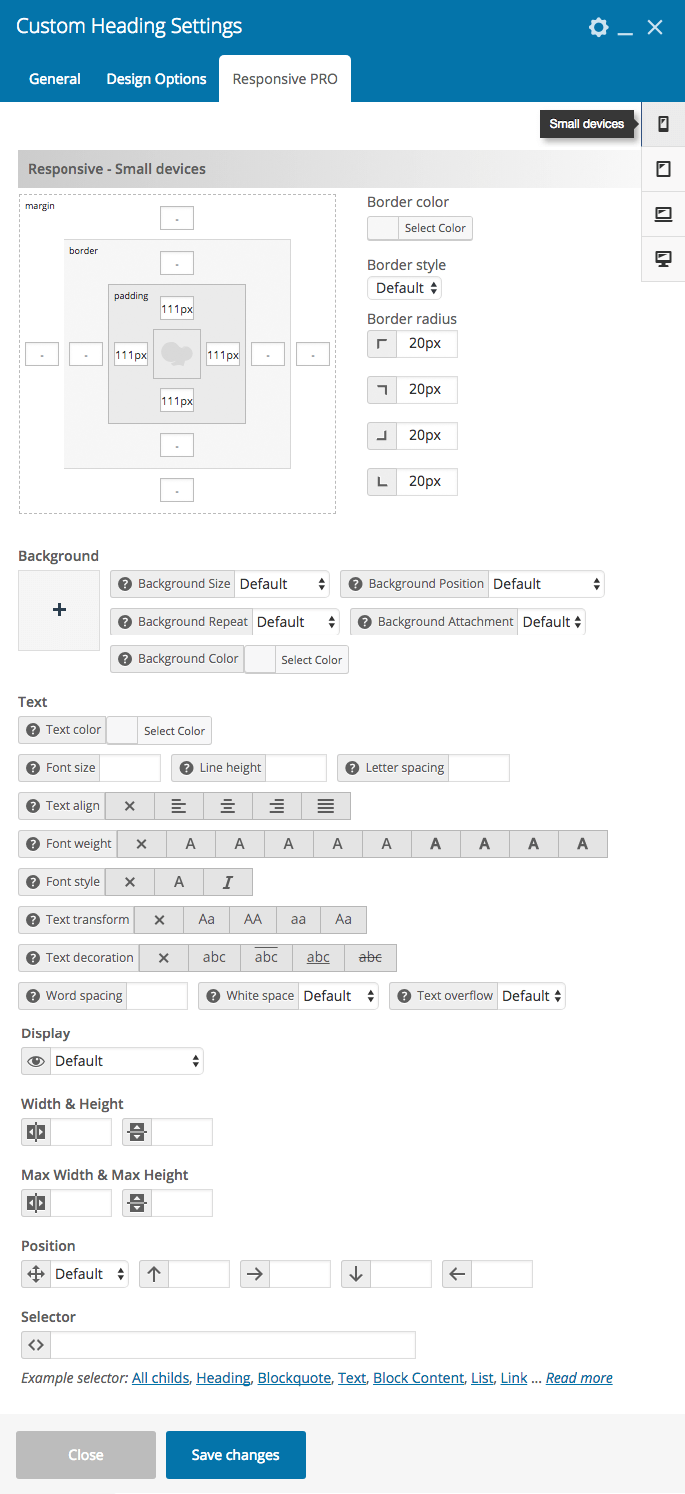
Responsive for elements
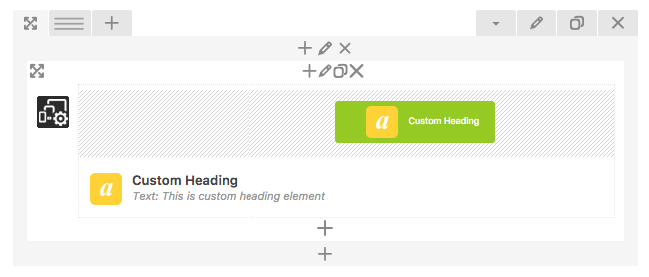
You can edit any post or page and when you edit shortcode you can click to tab Responsive WPB
2 ways to use responsive settings for any elements:
- Use responsive option for all shortcodes and just edit them
- Use "Responsive WPB" shortcode and drag & drop any elements into it
Examples
-
+
Demo Online
FAQs
-
+
Contact Us
Support: https://bestbug.ticksy.com/